Welcome to the T6 Thermostat installation manual․ This guide provides step-by-step instructions for installing, configuring, and maintaining your Honeywell T6 thermostat․ Ensure optimal performance and safety․
1․1 Overview of the T6 Thermostat
The Honeywell T6 thermostat is a cutting-edge, Wi-Fi-enabled smart thermostat designed for seamless home temperature control․ It offers geofencing, voice control, and smart home integration, ensuring optimal comfort and energy efficiency․ Compatible with various HVAC systems, the T6 features a user-friendly interface and advanced scheduling options․ Its sleek design and easy installation make it a versatile solution for modern homes, while its energy monitoring capabilities help users save on utility bills․ Ideal for homeowners seeking convenience and precision temperature management․
1․2 Importance of Proper Installation
Proper installation of the T6 thermostat is crucial for ensuring reliable performance, safety, and energy efficiency․ Incorrect installation can lead to system malfunctions, safety hazards, or reduced efficiency․ Following the manufacturer’s guidelines ensures compatibility with your HVAC system and prevents potential damage․ Correct wiring and setup are essential for accurate temperature control and smart features functionality․ Always disconnect power before starting installation to avoid electrical risks․ A well-installed T6 thermostat guarantees optimal comfort, energy savings, and long-term reliability․
Pre-Installation Checklist
Ensure you have all tools, verify system compatibility, and disconnect power․ Check for any existing wiring issues and prepare the installation area to avoid obstacles during setup․
2․1 Tools and Materials Needed
To install the T6 thermostat, you’ll need a screwdriver, drill, wall anchors, and screws․ Ensure you have the UWP mounting system, thermostat unit, and adapter․ Check for compatibility with your HVAC system and gather any additional wiring or connectors․ Consult the compatibility guide to confirm required materials․ Always verify wire labels and system specifications before starting․ Ensure all tools are within reach to streamline the installation process․ Safety first: disconnect power and double-check compatibility to avoid issues․
2․2 Safety Precautions
Always disconnect the main power supply before starting installation․ Failure to comply may result in serious injury or equipment damage․ Avoid placing the thermostat near drafts, direct sunlight, or heat sources․ Ensure it’s mounted at least 1․2 meters above the floor․ Follow all local electrical codes and manufacturer instructions carefully․ Never bind the receiver box and thermostat after power-up․ Use vibration-proof joints if necessary․ Ensure proper ventilation and avoid exposing the device to extreme temperatures or moisture․ Safety is paramount to ensure reliable operation and longevity of your T6 thermostat․
2․3 Compatibility Check
Before installation, verify the T6 thermostat’s compatibility with your HVAC system․ Ensure it supports your system type, such as forced air, heat pump, or radiant floor heating․ Check electrical requirements, including voltage and wiring configuration, to avoid mismatches․ Additionally, confirm compatibility with smart home systems like Apple HomeKit if integrating with your smart home setup․ Refer to the manual or manufacturer’s website for a list of supported systems and configurations․ Proper compatibility ensures seamless operation and optimal performance of your T6 thermostat․
System Requirements
The T6 thermostat is compatible with most HVAC systems, including gas, oil, electric, and heat pumps․ It requires a 24V power supply and a C-wire for optimal functionality․
3․1 Compatible HVAC Systems
The Honeywell T6 thermostat is designed to work with a variety of HVAC systems, including forced air, heat pumps, and radiant floor systems․ It is compatible with both single-stage and multi-stage heating and cooling systems․ Additionally, it supports geothermal systems and dual fuel setups, making it versatile for different home configurations․ Proper compatibility ensures efficient heating and cooling, optimizing energy usage and system performance․ Always check your system type before installation for seamless integration․
3․2 Electrical Requirements
The Honeywell T6 thermostat requires a 24-volt electrical system, ensuring compatibility with most home HVAC setups․ It supports single-stage, multi-stage, and heat pump systems․ A common wire (C-wire) is typically needed for proper operation, though some models may work without it using an adapter․ Always disconnect the power supply before installation to avoid electrical hazards․ The thermostat’s low power consumption ensures energy efficiency, and it adheres to standard safety protocols for electrical devices․ Follow local electrical codes for a safe and compliant installation․
3․4 Smart Home Integration Requirements
The Honeywell T6 thermostat seamlessly integrates with smart home systems, including Apple HomeKit and Amazon Alexa․ Ensure a stable internet connection and a compatible router for remote access․ Download the Honeywell Home app (available for iOS and Android) to control and monitor your thermostat․ For voice control, enable the Honeywell skill within your smart speaker app․ Geofencing and smart scheduling features enhance energy efficiency․ A working Wi-Fi network (2․4 GHz or 5 GHz) is essential for optimal performance and smart home functionality․
Installation Process
Install the T6 thermostat by mounting the UWP, attaching the device, connecting wires, and powering on․ Use the Honeywell Home app for initial setup and configuration․
4․1 Mounting the UWP (Universal Wall Plate)
To mount the UWP, first remove the existing thermostat and position the UWP on the wall․ Ensure it is level and mark the hole positions․ Drill pilot holes and secure the UWP using the provided screws․ The UWP is designed to fit standard-sized junction boxes, ensuring compatibility with most HVAC systems․ Once installed, the UWP provides a sturdy base for the T6 thermostat;
4․2 Attaching the Thermostat to the UWP
Once the UWP is installed, align the T6 thermostat with the plate, ensuring proper fit․ Gently push the thermostat onto the UWP until it clicks securely into place․ Make sure it is firmly attached and even․ After attaching, turn the power on at the breaker box and set the time and date on the thermostat․ This step ensures proper installation and prepares the system for operation․ The thermostat should now be ready for wiring connections․
4․3 Connecting Wires to the Thermostat
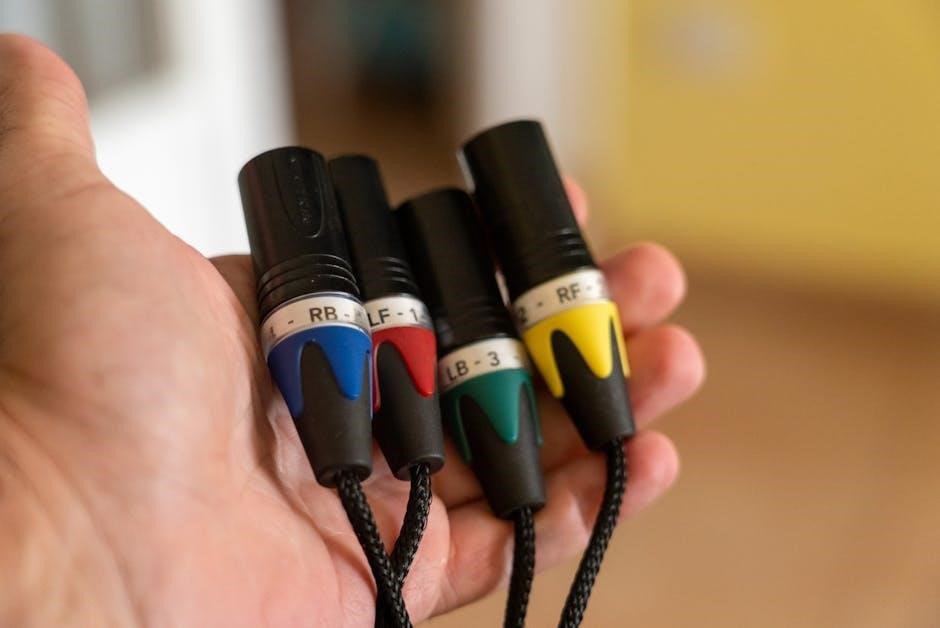
After attaching the thermostat to the UWP, proceed to connect the wires․ Match each wire to the corresponding terminal on the thermostat based on your system’s wiring configuration․ Typically, the red wire connects to the R terminal, the white wire to the W terminal, the yellow wire to the Y terminal, and the green wire to the G terminal․ The blue wire, if present, usually connects to the C terminal for common․ Ensure all connections are secure and properly seated․ Once connected, restore power at the breaker box and test the thermostat’s functionality by adjusting the temperature settings to confirm everything works correctly․ If unsure, consult the wiring diagram or contact a licensed electrician for assistance․
4․4 Powering On the System
Once all wires are connected, restore power at the breaker box or switch․ The thermostat’s display should illuminate, indicating successful power-up․ Check for any error messages or unusual behavior․ If the display remains blank, verify that power is indeed restored and all connections are secure․ Test the system by adjusting the temperature settings to ensure heating or cooling activates correctly․ If issues arise, refer to the troubleshooting section or consult a professional for assistance․ Proper power-up ensures safe and efficient system operation․

Initial Setup
After installation, set the time, date, and preferred temperature settings․ Configure heating/cooling options and pair the thermostat with the Honeywell Home app for remote control and advanced features․
5․1 Setting the Time and Date
Power on the thermostat and navigate to the menu․ Select “Time and Date” using the touch interface․ Enter the current time, date, and timezone․ Ensure accuracy for scheduling․ Save settings to complete the configuration․ Refer to the manual for detailed steps․ This ensures your thermostat operates correctly and maintains your preferred schedule efficiently․
5․2 Configuring Heating and Cooling Settings
Access the thermostat menu to configure heating and cooling settings․ Set your preferred temperature ranges for both modes․ Choose from predefined schedules or create custom ones․ Enable geofencing for smart temperature adjustments based on your location․ Ensure the system is set to “Heat” or “Cool” mode according to your needs․ Adjust the temperature differential to optimize performance․ Proper configuration ensures energy efficiency and comfort․ Refer to the manual for advanced options like smart home integration for enhanced control․
5․3 Pairing with the Honeywell Home App
Download the Honeywell Home app from the App Store or Google Play․ Open the app and select “Add Device․” Choose the T6 thermostat from the list of available devices․ Follow the in-app instructions to complete the pairing process․ Ensure your thermostat and smartphone are connected to the same Wi-Fi network․ Once paired, you can control your thermostat remotely, set schedules, and access advanced features like geofencing and energy monitoring․ The app simplifies thermostat management for enhanced convenience and efficiency․

Safety Considerations
Always disconnect power before starting installation․ Follow local electrical codes and manufacturer guidelines to avoid hazards․ Keep the thermostat away from direct sunlight and heat sources․
6․1 Electrical Safety Tips
Always disconnect the main power supply before starting installation to prevent electrical shocks․ Use a voltage tester to ensure no power is present․ Avoid installing the thermostat near direct heat sources or draughts, as this can affect performance․ Keep the device at least 1․2-1․5 meters above the floor․ Never overload circuits, and ensure all connections are secure․ Follow local electrical codes and manufacturer guidelines strictly․ If unsure, consult a licensed electrician to ensure safe installation․
6․2 Avoiding Common Installation Mistakes
To ensure a smooth installation, avoid common errors such as placing the thermostat in direct sunlight or near heat sources, which can affect temperature accuracy․ Properly align and secure the UWP to prevent improper seating of the thermostat․ Inspect the wiring harness for damage before connecting to avoid electrical issues․ Avoid rushing through setup; test each step thoroughly․ Consult the user manual or online resources for troubleshooting․ Finally, perform a post-installation safety check to identify and address any potential hazards, ensuring everything functions correctly and safely․
6․3 Emergency Shutdown Procedures
In case of an emergency, immediately switch off the thermostat and HVAC system․ Turn off the main power supply at the circuit breaker to ensure safety․ If a gas leak is suspected, shut off the gas supply valve and ventilate the area․ Do not restart the system until a qualified technician confirms it is safe․ Always prioritize caution and follow the manufacturer’s guidelines for emergency situations to prevent accidents or further damage․
Troubleshooting Common Issues
Explore common issues with the T6 thermostat, such as the device not turning on or displaying incorrect temperatures, and learn how to resolve them efficiently․
7․1 Thermostat Not Turning On
If the T6 thermostat fails to turn on, ensure the power supply is connected properly․ Check the circuit breaker and verify all wires are securely attached․ Confirm the UWP (Universal Wall Plate) is correctly mounted and the thermostat is snapped into place․ Ensure the power switch at the breaker box is in the “on” position․ If using batteries, check their installation and charge level․ Refer to the manual for specific troubleshooting steps to resolve the issue effectively․
7․2 Incorrect Temperature Readings
If the T6 thermostat displays incorrect temperature readings, ensure it is not placed near drafts, direct sunlight, or heat sources․ Verify the thermostat is mounted at least 1․2-1․5 meters above the floor for accurate measurements; Check the sensor calibration by accessing the settings menu and following on-screen instructions to recalibrate․ Ensure all wires are securely connected and free from damage․ If issues persist, consult the user manual or contact customer support for further assistance to resolve the problem effectively․
7․3 Connectivity Problems with the App
If you experience connectivity issues with the Honeywell Home app, ensure your thermostat is properly paired․ Restart your router and check your internet connection․ Verify the thermostat is powered on and connected to Wi-Fi․ Open the app, go to settings, and confirm the thermostat is listed․ If issues persist, reset the thermostat by turning off power at the breaker, then back on․ Reopen the app and retry pairing․ For further assistance, refer to the app’s troubleshooting section or contact customer support․
Advanced Features
The T6 thermostat offers advanced features like geofencing, voice control, and energy usage monitoring․ These enhance convenience, efficiency, and smart home integration for optimal performance․
8․1 Geofencing Setup
Geofencing allows your T6 thermostat to adjust temperatures based on your location․ Open the Honeywell Home app, navigate to settings, and enable location-based control․ Set your home and away zones by entering your address or manually adjusting the map․ Customize temperature preferences for when you leave or arrive home․ This feature optimizes energy usage and ensures comfort by automatically switching modes․ Ensure your device’s location services are enabled for proper functionality․
8․2 Voice Control Integration
Enhance your T6 thermostat experience with voice control through smart home systems like Apple HomeKit or Google Assistant․ Enable voice commands by linking your thermostat to your smart speaker․ Open the Honeywell Home app, navigate to settings, and select voice control options․ Authorize the connection and discover commands to adjust temperatures, switch modes, or check current settings․ Use phrases like “Hey Siri, set the living room to 72°F” for seamless control․ Ensure your devices are connected to the same network for reliable functionality;
8․3 Energy Usage Monitoring
Monitor your energy consumption efficiently with the T6 thermostat․ Access detailed reports via the Honeywell Home app or website to track historical usage․ This feature helps identify patterns and optimize settings for energy savings․ Customize alerts for unusual usage spikes, ensuring you stay informed․ By analyzing data, you can adjust your temperature preferences and schedules to reduce energy waste․ Regular monitoring empowers you to make smarter, eco-friendly choices while maintaining comfort․
Maintenance and Upkeep
Regularly clean the thermostat for accurate readings․ Check for firmware updates and ensure it’s free from obstructions․ Use the app to monitor maintenance needs and alerts․
9․1 Cleaning the Thermostat
Power off the system before cleaning․ Use a soft, dry cloth to wipe the thermostat’s exterior, avoiding harsh chemicals or liquids․ Gently remove dust from vents or sensors․ Ensure no obstructions are near the device․ Regular cleaning prevents inaccurate temperature readings and maintains efficiency․ For internal cleaning, consult the manual or use compressed air carefully․ Avoid touching sensitive components to prevent damage․ Keep the thermostat free from debris for optimal performance and longevity․
9․2 Updating Firmware
Regular firmware updates ensure your T6 thermostat operates with the latest features and security․ To update, open the Honeywell Home app and navigate to the thermostat settings․ Check for available updates and follow on-screen instructions․ The device will restart during the process․ Ensure the thermostat remains powered on and connected to Wi-Fi․ Updating firmware enhances performance, fixes bugs, and adds new functionalities․ Always use the official Honeywell channel for updates to maintain system integrity and reliability․
9․3 Replacing Batteries
To replace the batteries in your T6 thermostat, first, ensure the system power is turned off at the breaker․ Remove the thermostat from the wall plate by gently pulling it away․ Open the battery compartment, usually located at the back, and discard the old AA alkaline batteries․ Insert the new batteries, ensuring proper orientation․ Close the compartment and remount the thermostat․ Finally, restore power and check for proper functionality․ Replace batteries every 12 months or when the low-battery indicator appears․
Post-Installation Checks
After installation, test the system operation, ensure all settings are configured correctly, and perform a final safety inspection to confirm everything functions as intended․
10․1 Testing System Operation
After installation, turn on the power at the breaker box․ Set the time and date, then attach the thermostat to the UWP․ Test heating and cooling modes․
Ensure the thermostat responds to temperature adjustments․ Verify that the system cycles on and off correctly․ Check for any unusual noises or malfunctions during operation․
This step ensures the system operates smoothly and meets your comfort expectations․ If issues arise, refer to the troubleshooting section for solutions․
10․2 Ensuring Proper Functionality
After testing, verify that all features, like scheduling and geofencing, work seamlessly․ Check if the thermostat accurately reads the room temperature and adjusts accordingly․ Ensure the Honeywell Home app connects without issues, allowing remote control․ Program your preferred settings and confirm they activate as scheduled․ Proper functionality ensures energy efficiency and comfort, making your home automation experience smooth and hassle-free․ Address any discrepancies immediately to maintain system performance․
10․3 Final Safety Inspection
Conduct a thorough safety inspection post-installation․ Ensure all wires are securely connected and no bare wires are exposed․ Verify that the thermostat is not near direct sunlight, heat sources, or draughts․ Check for proper leveling and alignment․ Inspect the UWP and thermostat mounting for stability; Ensure no gas leaks if applicable․ Disconnect power before handling internal components․ Follow all safety guidelines provided in the manual to ensure compliance and prevent hazards․ This step is crucial for safe and reliable operation of your T6 thermostat․

Disposal and Recycling
Ensure environmentally responsible disposal of your T6 thermostat․ Check local e-waste regulations and consider recycling options․ Remove batteries and recycle separately․ Use designated facilities to prevent environmental harm․
11․1 Proper Disposal Methods
Dispose of the T6 thermostat responsibly by following local e-waste guidelines․ Remove batteries and recycle them separately․ Use certified recycling centers to ensure safe handling of electronic components․ Avoid landfill disposal to prevent environmental contamination․ Check with local authorities for designated drop-off locations․ Proper disposal protects the environment and adheres to regulations․ Always follow community-specific instructions for recycling electronic devices․ This ensures sustainability and compliance with environmental standards․
11․2 Recycling Options
Recycle your T6 thermostat through authorized e-waste facilities․ Many retailers offer free electronics recycling programs․ Check Honeywell’s official website for recommended recycling partners․ Participating centers ensure safe processing of materials․ Remove batteries before recycling․ Verify local regulations for specific guidelines․ Recycling helps conserve resources and reduces landfill waste․ Utilize community collection events for added convenience․ Proper recycling supports sustainability efforts and environmental responsibility․ Always choose certified recyclers to ensure compliance with safety standards․
Manufacturer Support and Resources
Honeywell provides comprehensive support for the T6 thermostat, including customer service, online manuals, and community forums․ Visit the official Honeywell website for detailed resources and contact information․
12․1 Contacting Customer Support
Honeywell’s customer support team is available 24/7 to assist with T6 thermostat-related inquiries․ You can reach them via phone, email, or live chat through the official Honeywell website․
For efficient support, have your thermostat model number and a detailed description of the issue ready․ Visit Honeywell’s official website for contact details and additional resources, including FAQs and troubleshooting guides․
12․2 Accessing Online Manuals
Honeywell provides comprehensive online manuals for the T6 thermostat, accessible via their official website․ Visit Honeywell’s website and navigate to the “Support” section․ Enter “T6 Thermostat” in the search bar to download PDF manuals, installation guides, and troubleshooting tips․ These resources are free and available 24/7, ensuring you have all the information needed for proper installation and operation of your thermostat․
12․3 Community Forums and FAQs
For additional support, visit Honeywell’s community forums and FAQs․ These resources offer troubleshooting tips, user discussions, and expert advice․ Accessible via Honeywell’s official website, the forums cover common issues and installation queries․ FAQs provide quick answers to frequently asked questions, ensuring smooth operation of your T6 thermostat․ Engage with other users and professionals to resolve concerns and optimize your thermostat’s performance․ Visit Honeywell’s website to explore these resources․
With your T6 thermostat successfully installed and set up, you’re ready to enjoy energy efficiency and comfort․ Refer to this manual for future guidance and troubleshooting․
13․1 Summary of Key Steps
Mount the UWP, attach the thermostat, and connect wires carefully․ Power on the system and complete initial setup, including time, date, and app pairing․ Ensure all safety guidelines are followed․ Test system operation thoroughly and troubleshoot any issues promptly․ Regular maintenance, such as cleaning and updating firmware, will ensure optimal performance․ Refer to this manual for detailed instructions and troubleshooting tips to maximize efficiency and comfort with your T6 thermostat․
13․2 Final Tips for Optimal Use
Regularly update your thermostat’s firmware for improved functionality․ Use geofencing and voice control for convenience․ Monitor energy usage to optimize savings․ Ensure proper placement, 1․2-1․5 meters from the floor, away from direct sunlight and heat sources․ Schedule routine cleaning and battery replacements․ Utilize the Honeywell Home app for remote adjustments and insights․ Always follow safety guidelines and local electrical codes․ For advanced features, refer to the app or manual for detailed instructions․ Enjoy enhanced comfort and efficiency with your T6 thermostat․